3D world has its own rules and physical laws. The Unity game engine offers a range of tools and components to simulate these laws. In this article, we will explore how to create more realistic and interactive physical behaviors on 3D objects using the Rigidbody component in Unity. Firstly, we’ll cover the importance of Rigidbody in Unity and how to add this component to an object. Without further ado, let’s dive into the details of this process.
What is Rigidbody in Unity?
In Unity, Rigidbody is a fundamental component used to manage the physical behaviors of 3D objects, playing a crucial role in game development. The Rigidbody component allows you to control how an object responds to physical forces like gravity, force, and torque.
First and foremost, understanding the effects of Rigidbody on a game object lays the foundation for creating a dynamic and realistic physics system in a game. Unity employs Newton’s laws of motion to simulate the physical world. The Rigidbody component applies these laws to the movements of objects, allowing them to move just like they would in the real world.
The Rigidbody component offers a set of features and tools that allow you to control the movement of an object. With this component, you can adjust an object’s mass, drag, and the effect of gravity, as well as apply force and torque. These features ensure your objects move in a natural and realistic manner.
How to Add the Rigidbody Component in Unity?
Adding the Rigidbody component to an object in Unity is the first step to creating a dynamic and interactive game world. It’s straightforward to add the Rigidbody component to an object. Here are the steps to do this:
- Open the Unity Editor and select the object in the Hierarchy window to which you want to add the Rigidbody component.
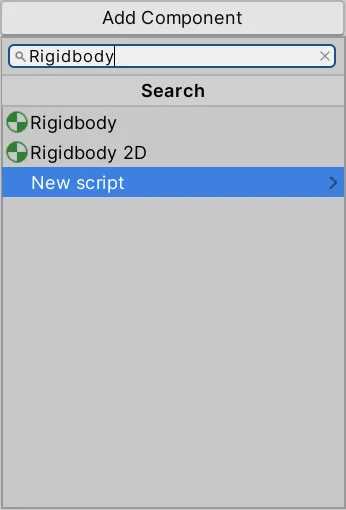
- In the Inspector window, click on the “Add Component” button.
- Select the “Physics” category and then choose “Rigidbody” (for 3D objects) or “Rigidbody 2D” (for 2D objects).
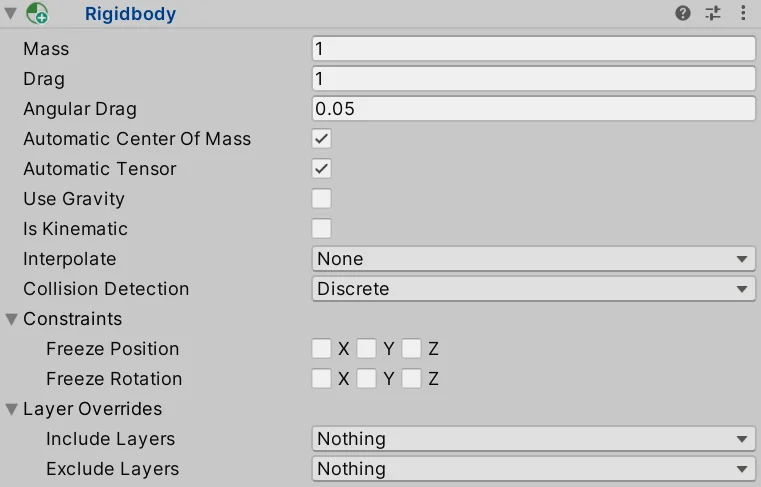
- Now, you can adjust various properties displayed in the Rigidbody component in the Inspector window. These properties include basic physical attributes like
Mass,Drag,Angular Drag, andGravity.
A Detailed Examination of Unity Rigidbody Component: Key Features
In the Unity game engine, the Rigidbody component allows you to control the physical behaviors of 3D objects. This component hosts a range of properties that help simulate the objects’ movements and interactions in the world more realistically.
Mass
The Mass property in Unity aids in determining an object’s “weight”. This property plays a pivotal role in the physical interactions of objects. For instance, if an object has a greater mass, it can exert a more significant impact on other objects. Here are the effects of increasing the mass value:
- Greater Mass Equals Increased Inertia: As mass increases, the object becomes more “inert”, meaning more force is required to move or stop it. This results in the object accelerating more slowly and moving for a longer duration.
- Greater Mass Leads to Lesser Speed Changes: An increase in mass means the object will experience less speed variation. Thus, when applying the same force, the object will accelerate or decelerate less.
- More Significant Impact in Physical Interactions: A higher mass will have a more significant effect when colliding with other objects. For example, a ball hitting a wall with a greater mass will decelerate with more force and less speed.
- Stabler Movements: Objects with a larger mass react more stably to external factors, showcasing smoother, predictable movements.
Considerations:
- Balance: When adjusting mass, it’s crucial to maintain balance among objects. Objects with excessively large or small masses can result in unpredictable behaviors in the game’s physical environment.
- Optimization: It’s vital to optimize the mass so it doesn’t negatively impact the overall performance of the game. Overly heavy objects might cause a drop in game performance.
- Testing: After adjusting the mass, it’s crucial to test its effects on the game. This can help in early detection of potential issues.
Drag
The Drag property in Unity represents an object’s air or fluid resistance. This feature controls how much an object “drags” or faces resistance when it moves, effectively simulating the force that slows down the objects; a critical component in mimicking natural movements.
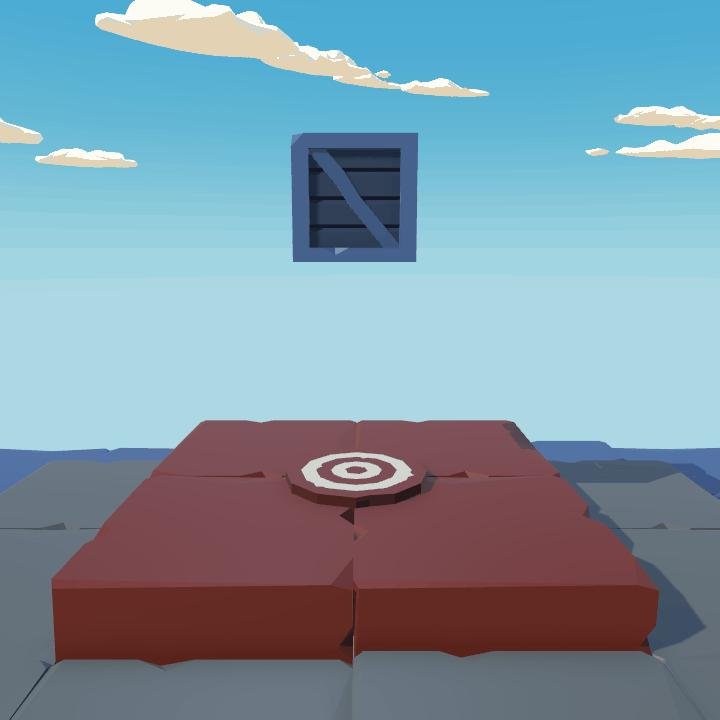
Drag -> 0
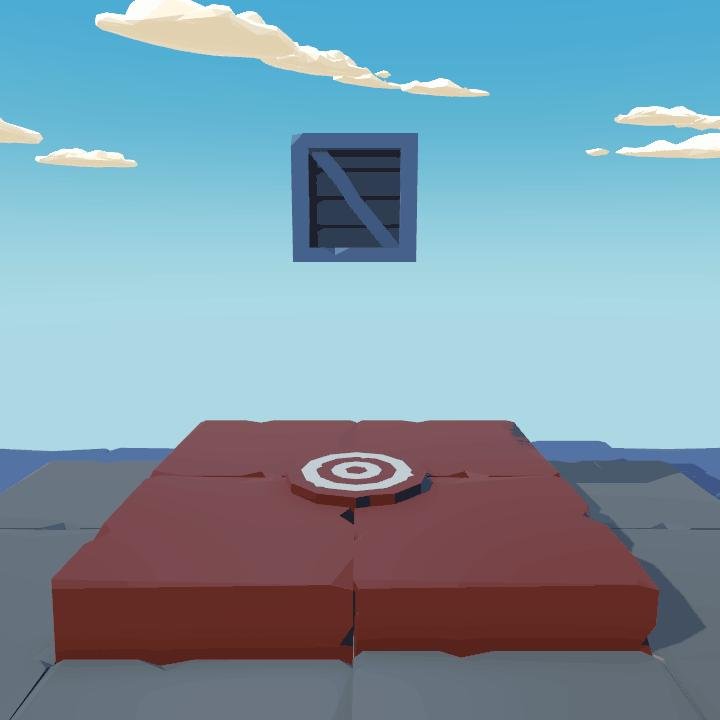
Drag -> 1
Tips:
- Realistic Movements: The Drag property gradually reduces the speed of objects, simulating real-world drag effects more effectively.
- Adjustments for Different Environments: Different environments (like water, air, etc.) require varied drag coefficients. Hence, setting distinct drag values based on the environment can aid in creating more realistic simulations.
Angular Drag
The Angular Drag property in the Unity game engine represents the resistance applied to an object’s rotational motion. This provides a simulation of how the object’s rotation speed will decrease over time. When used correctly, this feature helps game objects display more natural and realistic movements.
Angular Drag -> 0.05

Angular Drag -> 1
Tips:
- Balanced Usage: It’s essential for the Angular Drag value to be used in balance with other physical properties in the game (like Mass and Drag). This ensures a more consistent and believable physics in the game world.
- Optimization: High Angular Drag values can cause objects to slow down very rapidly, leading to unnatural movements. Therefore, optimizing this value is crucial.
Automatic Center of Mass
The Automatic Center of Mass property in the Unity game engine allows for the automatic calculation of an object’s center of mass. This feature prevents objects from moving erratically and makes physics simulations more consistent.

Unity calculates and adjusts the center of mass of an object based on its 3D model’s geometry automatically. This usually results in objects moving in a balanced and realistic manner. However, in some cases, the automatic center of mass calculation can cause objects not to move as desired. In such cases, manually adjusting the center of mass may be more appropriate.
Example Uses:
- Complex Geometries: The automatic center of mass calculation might not deliver ideal results for objects with complex geometries. In such cases, manually adjusting the center of mass can yield more balanced movements.
- Customized Movements: In some game scenarios, objects might need to display specific movements. For instance, you might want a vehicle to lean more forward. By manually adjusting the center of mass, you can achieve such customized movements.
Points to Consider:
- Balanced Settings: When manually adjusting the center of mass, ensure that the object doesn’t move erratically. Imbalanced movements can make your game’s physics simulations feel unrealistic.
- Expert Advice: Manually adjusting the center of mass might require some experience. Thus, researching and considering expert advice on this topic is essential.
Automatic Tensor
In Unity’s Rigidbody component, the Inertia Tensor represents a feature indicating the rotational resistance of an object. This attribute determines how hard or easy it is for an object to rotate about its axis. It significantly influences the rotation dynamics of the object, enhancing the physical accuracy of your game.

The Inertia Tensor is automatically computed as a function of an object’s mass and shape. While this is generally sufficient for most scenarios, there might be specific situations where you might need to adjust this tensor manually.
Use Cases:
- Unique Object Dynamics: In certain game scenarios, you might want objects to move in specific manners. In these cases, you can achieve such movements by manually adjusting the Inertia Tensor.
- Complex Geometries: While working with intricate geometries, automated calculations might not always yield optimal results. In these instances, manually adjusting the Inertia Tensor can help achieve more accurate results.
Things to Consider:
- Scientific Approach: Manually adjusting the Inertia Tensor necessitates a scientific approach. This should be done considering the object’s geometry and mass, ensuring more accurate and realistic results.
- Consultation from Experts: Such manual adjustments can be complex, and consulting with an experienced professional in the field can be beneficial.
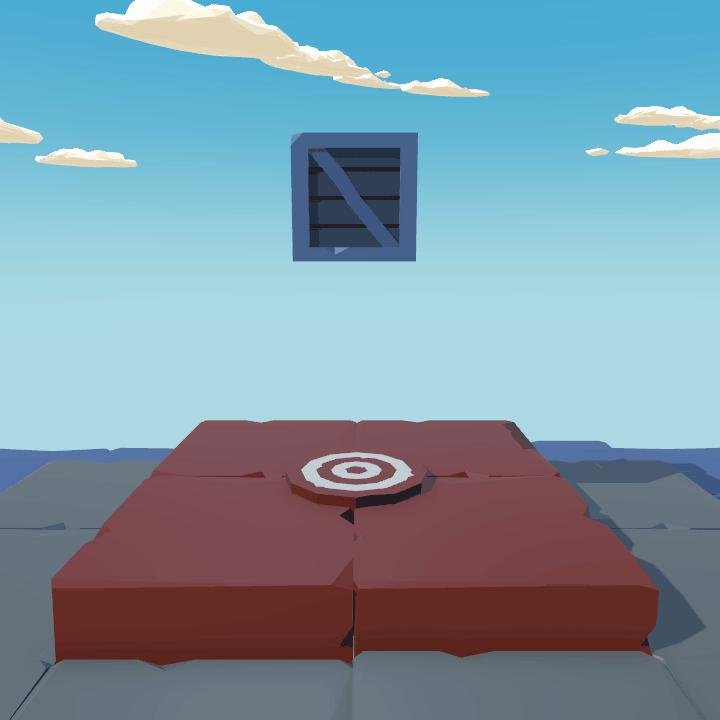
Use Gravity
In Unity’s Rigidbody component, the “use Gravity” property controls whether an object will be subjected to gravitational forces in the game world. This feature grants game developers considerable flexibility when creating physical simulations.
Things to Consider:
Optimization: The “Use Gravity” feature should not be overused, as this could negatively impact the game’s performance. Employing gravity simulations only when necessary can make your game more efficient.
Is Kinematic
The “is Kinematic” property in Unity’s Rigidbody component determines whether an object will be controlled by the physics engine. This property governs if an object will move dynamically or remain static.
When the “Is Kinematic” property is activated, the object becomes immune to physical forces and collisions, meaning it cannot be moved by the physics engine. Instead, the object can only be moved manually via its transform component. This is particularly beneficial for controlled animations and objects managed by scripts.
Use Cases:
- Animation-Controlled Objects: For objects moved by animations, the “is Kinematic” property can be utilized. This ensures animations operate smoothly without being disrupted by the physics engine.
- Script-Controlled Objects: Objects with the “Is Kinematic” property active can be precisely controlled via scripts, enabling the creation of more intricate and controlled movements.
Things to Consider:
- Collision Behaviors: With “Is Kinematic” active, the object won’t respond to physical collisions. However, collision detection still operates, so it’s possible to respond to collision events via scripts.
- Performance: Avoiding unnecessary use of the “Is Kinematic” feature can positively influence the game’s performance. It’s best to use this feature only when genuinely needed.
Interpolation
The “Interpolate” feature of the Rigidbody plays a critical role in the Unity 3D game development process, ensuring smoother and more realistic movement of objects.

This property offers three distinct options: None, Interpolate, and Extrapolate.
None
The “None” option disables interpolation. In this case, the object’s movement is updated at every step of the physics simulation. This is commonly used for faster, performance-focused simulations, but it can mean the movement appears somewhat rougher.
Use Cases:
- Scenarios where performance is critical.
- Simpler physics simulations or scenes with fewer objects.
Interpolate
The “Interpolate” option produces intermediate values between the object’s current and previous positions, resulting in a smoother movement. This creates more realistic and fluid animations, especially beneficial for objects moving at high speeds.
Use Cases:
- Rendering high-speed object movements more smoothly.
- Simulations where visual quality and detailed representation matter.
Extrapolate
The “Extrapolate” option predicts the object’s future position and places the object at this predicted position. This results in a less laggy movement, but due to incorrect predictions, it can lead to unexpected behaviors.
Use Cases:
- Low latency network simulations.
- As a prediction mechanism for multiplayer games.
Collision Detection in Unity
Unity’s Rigidbody component provides game developers with the capability to manage various types of collision detections. The “Collision Detection” property controls how collisions will be detected during the movement of objects.

This property offers four different options: Discrete, Continuous, Continuous Dynamic, and Continuous Speculative.
Discrete
“Discrete” collision detection is the most basic and fastest in terms of performance. This method checks for collisions at specific time intervals. However, for objects moving at high speeds or very small objects, collisions may be missed (tunneling effect).
Use Cases:
- Scenes where performance is a priority.
- Objects moving at low speeds or larger objects.
Continuous
“Continuous” collision detection offers a more advanced method to capture all collisions accurately. It is ideal for objects moving at high speeds as it prevents the “tunneling effect”.
Use Cases:
- High-speed objects.
- Simulations where collision details are critical.
Continuous Dynamic
The “Continuous Dynamic” option continuously checks for collisions only between dynamic objects and static objects. This provides more reliable collision detection for dynamic objects moving at high speeds, while maintaining performance to some extent.
Use Cases:
- High-speed dynamic objects.
- Significant interactions between dynamic and static objects.
Continuous Speculative
“Continuous Speculative” collision detection predicts and prevents potential collisions. This technique is used to optimize performance and can help prevent the tunneling effect, although it’s generally necessary except for some specific cases.
Use Cases:
- Multiplayer online games.
- High-performance physics simulations.
Constraints
The “Constraints” property of the Rigidbody offers a set of options in the Unity 3D game development platform to restrict movement or rotation along specific axes. This feature is crucial for preventing undesired motions of objects and creating more controlled simulations.
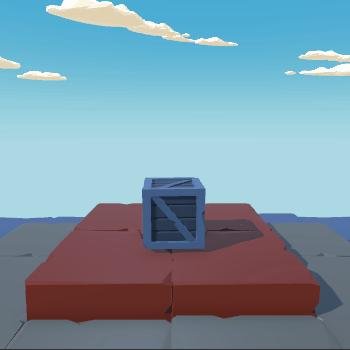
Freeze Rotation values are not active.

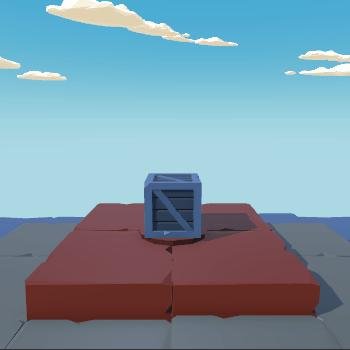
Freeze Rotation values are active.

Freeze Position
This section provides options for freezing positions on the X, Y, and Z axes. Freezing the position on one or more axes prevents the object from moving along that axis.
Freeze Rotation
This section, on the other hand, includes options for freezing rotations on the X, Y, and Z axes. Freezing the rotation on one or more axes prevents the object from rotating along that axis.
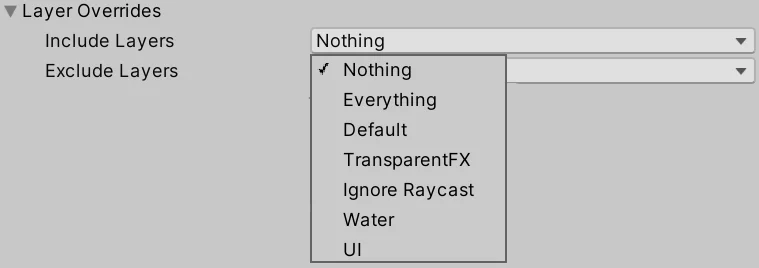
Layer Overrides
The “Layer Overrides” property in Unity’s Rigidbody component allows you to customize physical interactions on specific layers. This enables more detailed control over the interactions of specific objects or layers with each other.
Include Layer
The “Include Layer” option allows a specific layer to interact with other layers. In other words, it permits objects on this layer to physically interact with objects on specific other layers.

Use Cases:
- For instance, if you have a “player” layer and an “enemy” layer, you can use the “Include Layer” option to allow these two layers to interact with each other.
- It can be used when you want to simulate specific interactions, only allowing specific layers to communicate with each other.
Exclude Layers
The “Exclude Layers” option performs the opposite function. This option ensures that a specific layer does not interact with other layers. In other words, it allows objects on this layer not to physically interact with objects on other specific layers.
Use Cases:
- If you have a “background” layer and you don’t want this layer to interact with other physical objects, the “Exclude Layers” option is ideal.
- It can be used when you want to exclude certain layers to optimize performance or prevent unwanted physical interactions.
Example Scenarios:
- Invisible Walls: If you want to create a wall in your game area that the player cannot pass but cannot see, you can place this wall on a layer and use “Exclude Layers” to prevent interaction with the player layer.
- Special Interactions: For example, if you have a “magic” layer and you want these spells to interact only with “enemies”, you can use the “Include Layer” option.
Unity Rigidbody: All Properties (Properties)
In this article, we examined each of these properties in detail. However, as a visual reference or a quick reminder, you can find the “Properties” table taken from Unity’s official documentation below. This table contains a brief description and default values for each property. With this table, you can see all Rigidbody properties at a glance and use it as a quick reference during development.
| angularDrag | The angular drag of the object. |
| angularVelocity | The angular velocity vector of the rigidbody measured in radians per second. |
| automaticCenterOfMass | Whether or not to calculate the center of mass automatically. |
| automaticInertiaTensor | Whether or not to calculate the inertia tensor automatically. |
| centerOfMass | The center of mass relative to the transform’s origin. |
| collisionDetectionMode | The Rigidbody’s collision detection mode. |
| constraints | Controls which degrees of freedom are allowed for the simulation of this Rigidbody. |
| detectCollisions | Should collision detection be enabled? (By default always enabled). |
| drag | The drag of the object. |
| excludeLayers | The additional layers that all Colliders attached to this Rigidbody should exclude when deciding if the Collider can come into contact with another Collider. |
| freezeRotation | Controls whether physics will change the rotation of the object. |
| includeLayers | The additional layers that all Colliders attached to this Rigidbody should include when deciding if the Collider can come into contact with another Collider. |
| inertiaTensor | The inertia tensor of this body, defined as a diagonal matrix in a reference frame positioned at this body’s center of mass and rotated by Rigidbody.inertiaTensorRotation. |
| inertiaTensorRotation | The rotation of the inertia tensor. |
| interpolation | Interpolation provides a way to manage the appearance of jitter in the movement of your Rigidbody GameObjects at run time. |
| isKinematic | Controls whether physics affects the rigidbody. |
| mass | The mass of the rigidbody. |
| maxAngularVelocity | The maximum angular velocity of the rigidbody measured in radians per second. |
| maxDepenetrationVelocity | Maximum velocity of a rigidbody when moving out of penetrating state. |
| maxLinearVelocity | The maximum linear velocity of the rigidbody measured in meters per second. |
| position | The position of the rigidbody. |
| rotation | The rotation of the Rigidbody. |
| sleepThreshold | The mass-normalized energy threshold, below which objects start going to sleep. |
| solverIterations | The solverIterations determines how accurately Rigidbody joints and collision contacts are resolved. Overrides Physics.defaultSolverIterations. Must be positive. |
| solverVelocityIterations | The solverVelocityIterations affects how how accurately Rigidbody joints and collision contacts are resolved. Overrides Physics.defaultSolverVelocityIterations. Must be positive. |
| useGravity | Controls whether gravity affects this rigidbody. |
| velocity | The velocity vector of the rigidbody. It represents the rate of change of Rigidbody position. |
| worldCenterOfMass | The center of mass of the rigidbody in world space (Read Only). |
You can use this table tailored to specific scenarios you encounter in your project. Understanding the purpose of each property allows you to better control the physical behaviors of your game, enriching your gaming experience.
Public Methods of Rigidbody
The Rigidbody component in Unity is not limited to various properties alone. It also offers various public methods that provide developers with more control and flexibility over the movement, rotation, and other physical interactions of the object. These methods are indispensable, especially for complex physics simulations or specific interactions, allowing you to perform special movements or interactions on physical objects in your game.
AddExplosionForce
Explosions are an indispensable element of many games. Scenes like a grenade exploding, a gas canister blowing up, or a massive shockwave tossing objects around can offer players impressive and unforgettable moments. This is where Unity’s AddExplosionForce public method comes into play.
The AddExplosionForce method applies explosive force to all rigidbody objects interacting within a certain radius from a specified explosion center. This ensures that objects closer to the explosion center are thrown with greater force, while those further away are less affected. The method operates by taking parameters such as explosion force, explosion center, and interaction radius.
Game developers can use this method to create realistic explosion effects. For instance, if a player detonates dynamite, surrounding boxes, barrels, and other objects can be tossed in different directions and at various speeds depending on the intensity of the dynamite and the player’s distance from it.
public float radius = 1.0f;
public float power = 200.0f;

Rigidbody rb;
Vector3 explosionPos;
void Start()
{
    explosionPos = transform.position;
    Collider[] colliders = Physics.OverlapSphere(explosionPos, radius);
    foreach (Collider hit in colliders)
    {
        rb = hit.GetComponent<Rigidbody>();
    }
}

private void Update()
{
    if (Input.GetKeyDown(KeyCode.Space))
    {
        rb.AddExplosionForce(power, explosionPos, radius, 3.0F);
    }
}
In conclusion, AddExplosionForce is a perfect tool for creating dynamic and realistic explosion simulations in games. For developers looking to animate an explosion effect and simulate its impact on objects within the game world, this method is an invaluable helper.
AddForce
One of the fundamental elements of movement in the world of physics is force. In Unity, we possess a versatile public method named AddForce. This method simulates the movement of objects within the game by applying a specific force. It’s frequently employed, especially when designing physics-based game mechanics.

The AddForce method applies force in the direction of the vector you specify. This can be used in various scenarios like striking a ball, accelerating a vehicle, or the effect of wind.
One of the most prominent features of the method is the ForceMode parameter used to determine the type of force applied. This parameter can take four different values:
- ForceMode.Force: This is the standard mode for applying force. The applied force changes the object’s speed depending on its mass. It’s mainly used for continuous forces like gravity.
- ForceMode.Acceleration: This mode applies acceleration without considering the mass. It ensures that all objects, regardless of their mass, accelerate in the same way.
- ForceMode.Impulse: This mode imparts an instantaneous force. It considers the object’s mass to provide an instant velocity. Particularly used in explosions or one-time interactions.
- ForceMode.VelocityChange: Directly changes the object’s velocity without considering its mass. Handy especially when you want to change an object’s speed abruptly.
void Start()
{
    rb = GetComponent<Rigidbody>();
}

private void Update()
{
    if (Input.GetKeyDown(KeyCode.Space))
    {
        rb.AddForce(transform.forward * 20f);
    }
}
In summary, the AddForce method is a critical tool for achieving dynamic movements and interactions in Unity games. Depending on the type and magnitude of the force applied, various physical interactions can be simulated with this method.
AddTorque
In physics-based movements, not only linear but also rotational movement plays a vital role. In Unity, the public method AddTorque assists us in imparting rotational motion to objects. This method applies a torque (rotational force) on an object around a specific axis, causing the object to start rotating.
AddTorque proves useful in scenarios like rotating wheels, opening doors, rotating platforms, or when an object rolls upon hitting the ground. Moreover, it can also simulate the reaction of an object when pushed or pulled by the player.
void Start()
{
    rb = GetComponent<Rigidbody>();
    rotationSpeed = 10.0f;
}

void Update()
{
    float rotationAmount = rotationSpeed * Time.deltaTime;
    Vector3 rotation = Vector3.up * rotationAmount;
    rb.AddTorque(rotation);
}
This method allows us to specify the direction and magnitude of the torque through a vector. For instance, applying a positive torque on the y-axis may cause the object to rotate counter-clockwise. Similarly, applying a negative torque on the z-axis might cause the object to rotate in the direction of the clock.
The effect of the applied torque is controlled by a vector, defined by its axes and magnitudes, rather than the object’s center of mass. This makes the rotation movement more predictable and manageable, especially when working with asymmetric objects.
MovePosition
The MovePosition method is used to physically change the current position of the Rigidbody to a specified position. This method is quite useful when wanting to simulate the movement of an object to a target position via animation or script.
Traditionally, using MovePosition instead of directly moving with transform properties provides a more consistent interaction with the physics engine. This is particularly important when moving an object that interacts with other objects. For instance, in a platform game scenario where a platform carries the player, you can use MovePosition to ensure the platform interacts correctly with other objects.
MovePosition does not directly set the new position of the Rigidbody; instead, it moves the Rigidbody towards the specified position. This is helpful in preventing unexpected collisions, especially with fast-moving objects.
void Start()
{
    m_Rigidbody = GetComponent<Rigidbody>();
}

void FixedUpdate()
{
    Vector3 m_Input = new Vector3(Input.GetAxis("Horizontal"), 0, Input.GetAxis("Vertical"));
    m_Rigidbody.MovePosition(transform.position + m_Input * Time.deltaTime * 5f);
}
In conclusion, the MovePosition method facilitates physics-based movement of objects and is ideal for ensuring movement is consistent with the physics engine. Particularly in dynamic game environments, this method is preferred to ensure objects and characters interact appropriately with other objects.
MoveRotation
The MoveRotation method is used to physically alter the current rotation angle of the Rigidbody towards a specified Quaternion value. This is exceedingly useful when simulating an object rotating towards a specific direction.
Conventionally, directly rotating with transform properties can sometimes yield unpredictable results. This can be problematic, especially when the object interacts with other physical entities. MoveRotation ensures that the object’s rotation is more aligned with the physics engine during such interactions.
Consider an object that moves like an arm rotating around a door. When simulating this movement, we might want the arm to consistently contact the door. In such a scenario, using MoveRotation ensures consistent contact of the arm towards the door.
Moreover, the MoveRotation method can achieve rotation not abruptly but at a certain speed. This is crucial for simulating more realistic and natural motions.
void Start()
{
    m_Rigidbody = GetComponent<Rigidbody>();
    m_EulerAngleVelocity = new Vector3(0, 100, 0);
}

void FixedUpdate()
{
    Quaternion deltaRotation = Quaternion.Euler(m_EulerAngleVelocity * Time.fixedDeltaTime);
    m_Rigidbody.MoveRotation(m_Rigidbody.rotation * deltaRotation);
}
In conclusion, the MoveRotation method is a splendid tool for controlling the physics-based rotation of objects. In dynamic game settings, this method is an ideal choice for ensuring objects and characters rotate in a specific direction.
Unity Rigidbody: All Public Methods
Below, you will find the Public Methods table sourced from Unity Docs. This table offers brief explanations about what each method accomplishes. By reviewing this table, developers can gain a deeper understanding of these functionalities provided by Rigidbody.
| AddExplosionForce | Applies a force to a rigidbody that simulates explosion effects. |
| AddForce | Adds a force to the Rigidbody. |
| AddForceAtPosition | Applies force at position. As a result this will apply a torque and force on the object. |
| AddRelativeForce | Adds a force to the rigidbody relative to its coordinate system. |
| AddRelativeTorque | Adds a torque to the rigidbody relative to its coordinate system. |
| AddTorque | Adds a torque to the rigidbody. |
| ClosestPointOnBounds | The closest point to the bounding box of the attached colliders. |
| GetAccumulatedForce | Returns the force that the Rigidbody has accumulated before the simulation step. |
| GetAccumulatedTorque | Returns the torque that the Rigidbody has accumulated before the simulation step. |
| GetPointVelocity | The velocity of the rigidbody at the point worldPoint in global space. |
| GetRelativePointVelocity | The velocity relative to the rigidbody at the point relativePoint. |
| IsSleeping | Is the rigidbody sleeping? |
| Move | Moves the Rigidbody to position and rotates the Rigidbody to rotation. |
| MovePosition | Moves the kinematic Rigidbody towards position. |
| MoveRotation | Rotates the rigidbody to rotation. |
| ResetCenterOfMass | Reset the center of mass of the rigidbody. |
| ResetInertiaTensor | Reset the inertia tensor value and rotation. |
| SetDensity | Sets the mass based on the attached colliders assuming a constant density. |
| Sleep | Forces a rigidbody to sleep at least one frame. |
| SweepTest | Tests if a rigidbody would collide with anything, if it was moved through the Scene. |
| SweepTestAll | Like Rigidbody.SweepTest, but returns all hits. |
| WakeUp | Forces a rigidbody to wake up. |
Rigidbody Messages
The Rigidbody component operates as part of Unity’s physics engine and offers a series of “Message” functions to define specific events during these physical interactions. These messages are triggered in response to various collision scenarios, allowing game developers to execute specific code during the physical interactions of objects.
| OnCollisionEnter | OnCollisionEnter is called when this collider/rigidbody has begun touching another rigidbody/collider. |
| OnCollisionExit | OnCollisionExit is called when this collider/rigidbody has stopped touching another rigidbody/collider. |
| OnCollisionStay | OnCollisionStay is called once per frame for every Collider or Rigidbody that touches another Collider or Rigidbody. |
Specifically, there are three main messages: OnCollisionEnter, OnCollisionStay, and OnCollisionExit. These messages describe the moments a Rigidbody interacts with other colliders. With these messages, we can monitor the entire process from the moment an object first contacts another, while it remains in continuous contact, and finally until contact is broken. This is a critical tool for enriching game mechanics and interactions.
OnCollisionEnter
The OnCollisionEnter message is triggered the moment a Rigidbody makes initial contact with another collider. This is quite useful during the game development process for carrying out specific actions or responses when an interaction begins between two objects.
For instance, this message can be triggered when a game character falls to the ground or hits a wall. It can be used to inflict damage on the player, play a sound effect, or generate a collision impact.
void OnCollisionEnter(Collision collision) {
    if(collision.gameObject.tag == "Ground") {
        Debug.Log("Touched the ground!");
    }
}
In the example above, we’re checking if an object is in contact with another object labeled “Ground”. If there’s contact, a message is printed to the console.
OnCollisionStay
The OnCollisionStay message is triggered during every physics update while two colliders continuously remain in contact. This is highly beneficial when there’s an ongoing interaction between two objects, requiring specific actions or reactions throughout the duration of the interaction.
This message can be triggered, for instance, when a game character continuously stands on a platform or when an object remains in constant contact with a wall. It can be used to continuously inflict damage, play a persistent sound effect, or play a constant animation on the object.
void OnCollisionStay(Collision collision) {
    if(collision.gameObject.tag == "Lava") {
        Debug.Log("In contact with lava! Losing health!");
    }
}
In the example above, we’re checking if an object continuously interacts with another object tagged “Lava”. If the contact persists, a warning message is printed to the console.
OnCollisionExit
The OnCollisionExit message is triggered when contact between two colliders is terminated. This message becomes active from the moment an object’s contact with another object ceases. It’s used to generate specific reactions or operations upon the end of the contact.
This message might be triggered, for instance, when a game character jumps off a platform or when an object loses its contact with a wall. This can be used to trigger specific animations upon the end of the contact, cease inflicting damage, or stop a sound effect.
void OnCollisionExit(Collision collision) {
    if(collision.gameObject.tag == "Platform") {
        Debug.Log("Lost contact with the platform! Falling down!");
    }
}
In the example above, we check if an object has ceased its contact with another object tagged “Platform”. If the contact is broken, a warning message is printed to the console.
Considerations When Using OnCollision Messages and Frequently Asked Questions
OnCollisionEnter, OnCollisionStay, and OnCollisionExit messages are quite handy, but it’s essential to know certain details to use them effectively.
Things to Note:
- Rigidbody Check: For these messages to trigger, at least one of the interacting objects needs to have a
Rigidbodycomponent. - Isolation: If an object has a static (
isKinematicproperty set to true)Rigidbody, it only detects collisions with other movingRigidbodies. - Performance:
OnCollisionStayis continuously called. Therefore, be cautious about performance when using this message.
Frequently Asked Questions:
Q: Why isn’t my OnCollisionEnter message triggering?
A: Several possible reasons for this issue include:
None of the objects have a Rigidbody component.
Colliders not being set up correctly.
The isKinematic property of the Rigidbody being improperly configured.
Q: How often is the OnCollisionStay message called?
A: This message is called during every physics update while two objects are in contact. Hence, performance considerations are crucial.
Q: Why is OnCollisionExit triggering multiple times?
A: This typically happens when objects frequently break and re-establish contact. This can be due to physics computations or collider settings.
Q: Do OnCollision messages work in 2D games?
A: No, for 2D games, you should use the 2D equivalents: OnCollisionEnter2D, OnCollisionStay2D, and OnCollisionExit2D.
Q: My objects are in contact, but the OnCollision messages aren’t triggering. Why?
A: This could be due to misconfigured or missing colliders, incorrect Rigidbody properties, or you might need to check the layer settings of the objects.
These tips and frequently asked questions should help you use OnCollision messages more effectively. However, it’s crucial to remember that each game can have its unique scenarios, so always conduct thorough testing.
We’ve taken a deep dive into Unity’s Rigidbody component and its associated features, public methods, and messages. Rigidbody is an indispensable tool for game developers when creating physics-based movements and interactions. When used correctly, it can add realism and vibrancy to your game.
If you have any questions or doubts about any topic covered in this article, please share with us in the comment section below. We’ll try to answer all queries. Remember, the best way to fully grasp a subject is to gain experience and practice with it. Experiment with Unity’s Rigidbody, create different scenarios, and put what you’ve learned into practice.
Thank you for your interest in game development and for reading this article. We wish you success!